Aria Automation Rebuild VMs – images
As you may all know, Aria Automation 8.12 incorporated a new Rebuild day-2 feature with the aim to support re-provisioning of vSphere machines while keeping basic configurations in tact. Under the hood this rebuild action deletes the VM and then re-creates the VM while maintaining all of it’s properties. At that moment in time the feature was only available for existing deployments coming from Aria Automation itself. Support for Migrated/onboarded machines came in version 8.13 with an additional pop-up message that informed us on the image used for the rebuild, or an image selection-list if the image was not be present. Recently, since release 8.16.0, the rebuild feature was enhanced to support missing-images for onboarded machines, and an option to rebuild individual machines in the deployment.
Although this new rebuild feature is very interesting, customers were looking to make more use of the feature, and in such a way, they could influence the image used for rebuild (updated OS-image). Questions arose on how-to trigger the new missing-image pop-up, and how-to inject new image properties for a rebuild to use. Luckily, we have several API’s at our disposal to make this happen of which some are available in vRO. Knowing this, we are able to define the following scenarios:
- Default missing-image behavior for onboarded machines
- Reset deployment to trigger the missing-image pop-up
- Run Rebuild-API while injecting new image
- Patching new image for existing deployment
This blog will describes how to use the individual API’s (or vRO-workflows) to collect information, trigger rebuilds and inject new image referencing properties. This, for you, to use as a base for more extensive scrips or workflows. I will use a mix of GUI, curl and Postman examples where the assumption is made you know how to work with authentication tokens, variables and cmd-line options to suit it to your needs.
Disclaimer: some API’s use VMware’s ‘uerp’ internal provisoning calls which are officially not intended for public use. So, use at own risk and not supported!
1. Default missing-image behavior
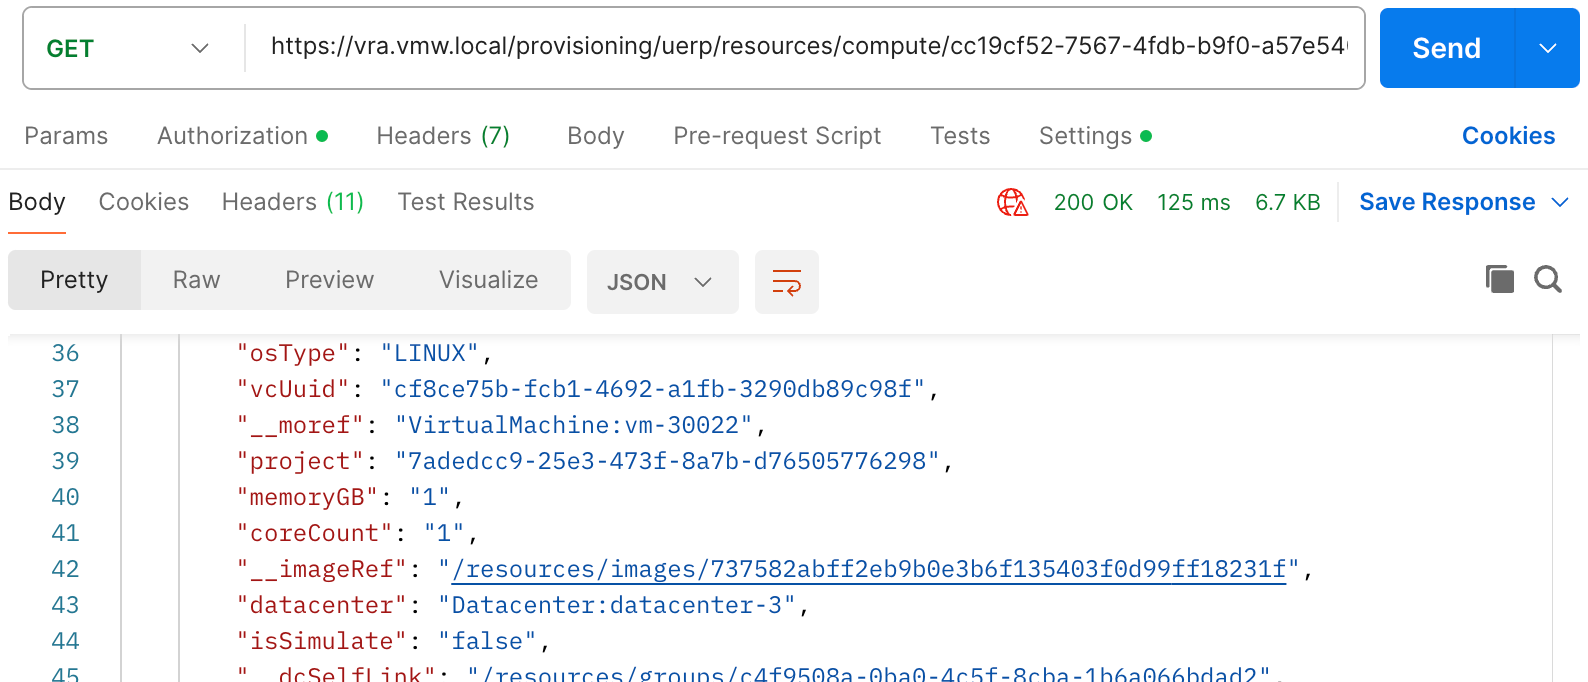
For onboarded machines there are no custom-properties in place that reference an image. Therefore, when we rebuild an onboarded VM, we will get a pop-up alerting us on the fact this deployment is missing an image. Below an API example how to list all (including hidden) custom-properties of a Machine, in this case an onboarded one.
You can find the resourceid of a deployment from Assembler > Resources > Deployments > Topology > vSphere-Machine > Custom properties
Within the result of this API-GET command we will find only one reference to an image:
The resulting pop-up we get after selecting the day-2 rebuild action looks like this.
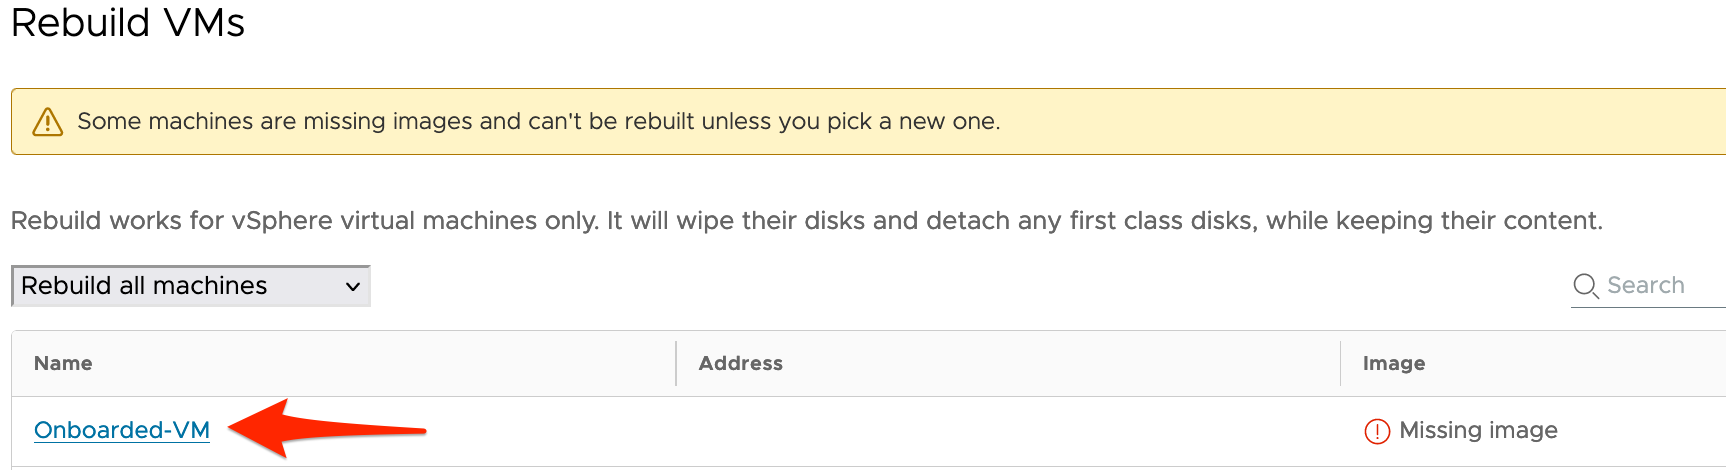
To continue, we need to click on the Machine-name and select the appropriate image in the pop-up that follows.
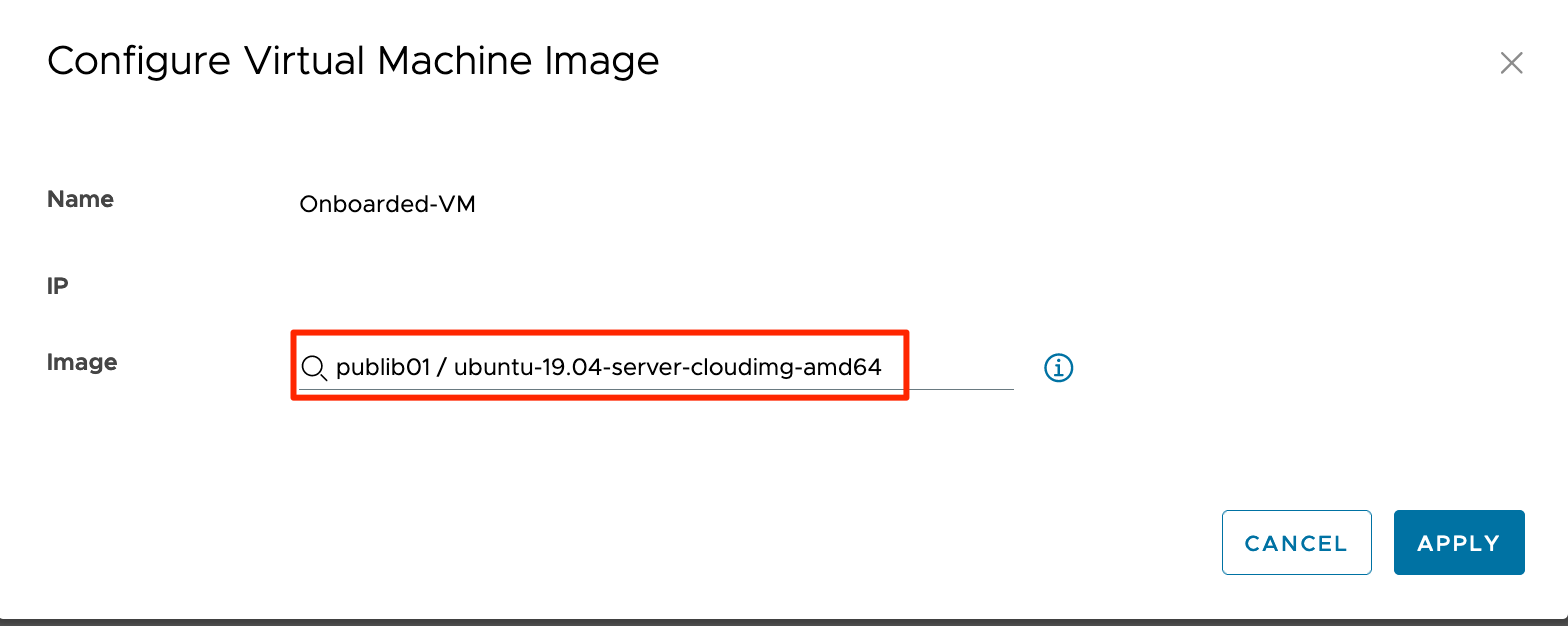
Once we hit APPLY, the actual rebuild is executed on the endpoint. Good time to check the selected image is used for re-provisoning the VM! After the rebuild was successful, it’s also a good idea to check for the properties again and see what has changed! An example of what can be found:
Interesting to see two new (hidden) custom-properties are used to reference the image used for deployment of this machine. The other one is an old known custom-property [cloneFromImage] that we could use in earlier versions of vRA (<8.12) to influence image-behavior. Currently this property is only used as the image-name in the rebuild pop-up. Below an example:

This concluded this first part of the standard rebuild functionality in Aria Automation, and I hope you’ve noticed the little details that makes us think what we can do more with this information.
2. Reset deployment to trigger the missing-image pop-up
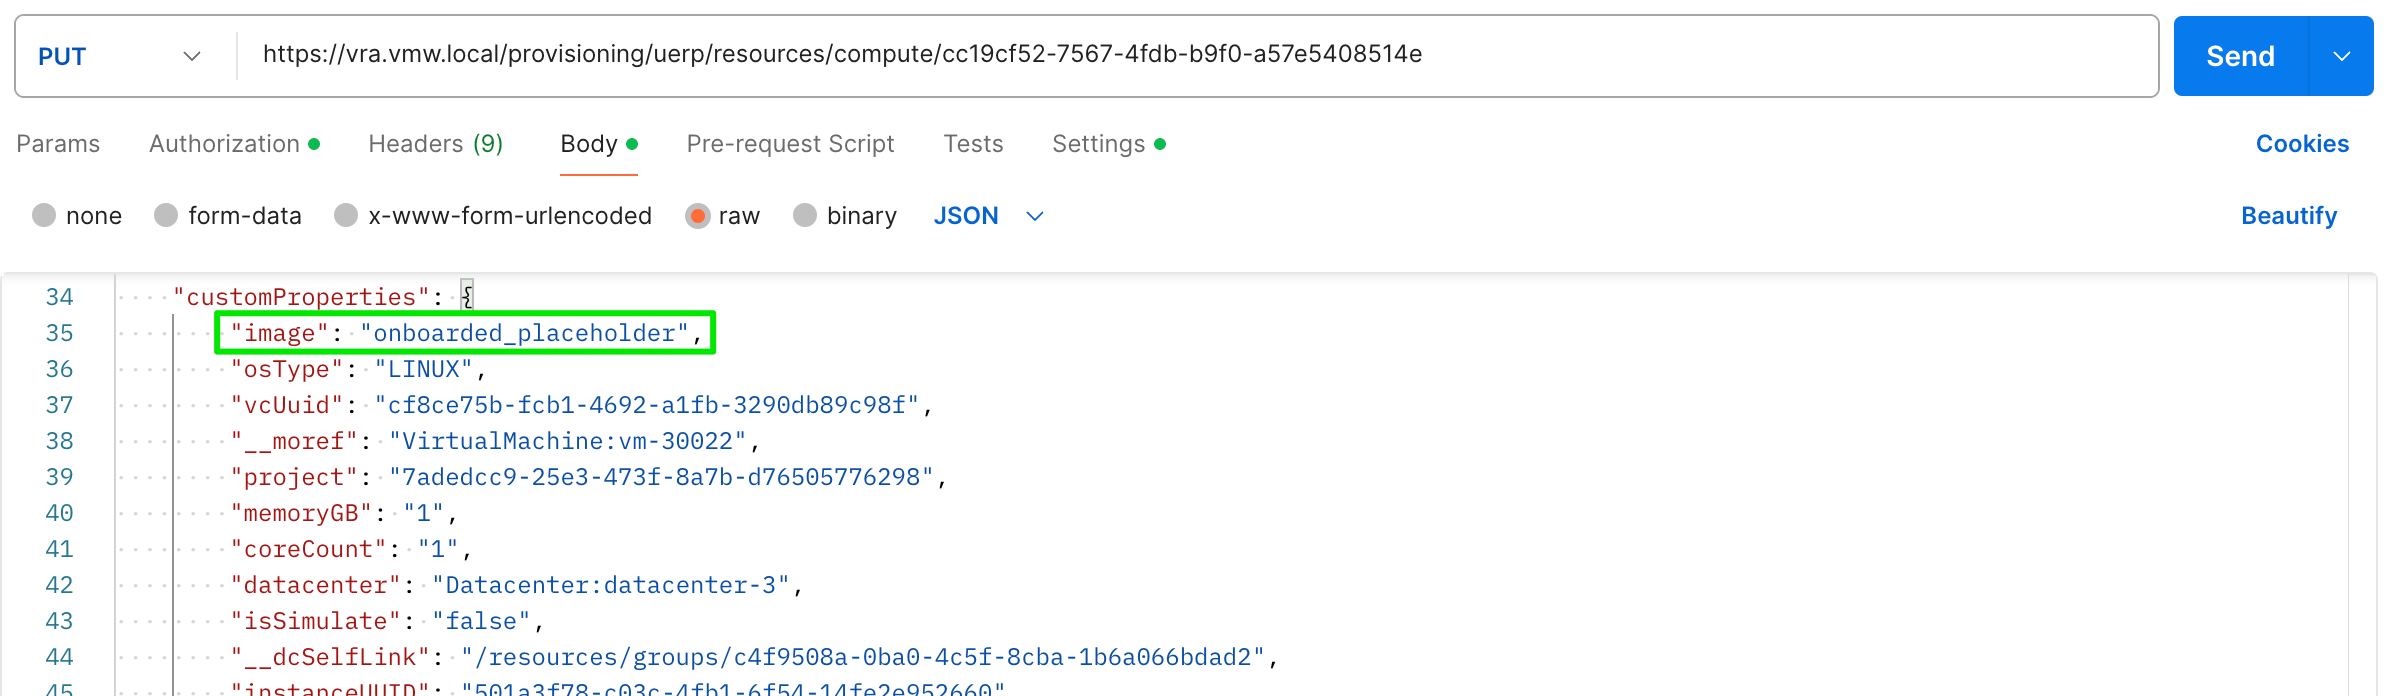
The first thing that comes into mind is the question on how we can re-trigger the missing-image pop-up on deployments that already contain image-references. The answer is quite simple! Just delete all image-reference properties and introduce the “onboarded_placeholder” property. We can achieve this by using the following Postman API examples!
First we need to collect the current payload for a deployment:
Then, copy the payload and add/remove the following entries:
Use the following API-call to overwrite the deployment with the new payload:
Now, confirm a rebuild of this deployment triggers the missing-image feature!
3. Run Rebuild-API while injecting new image
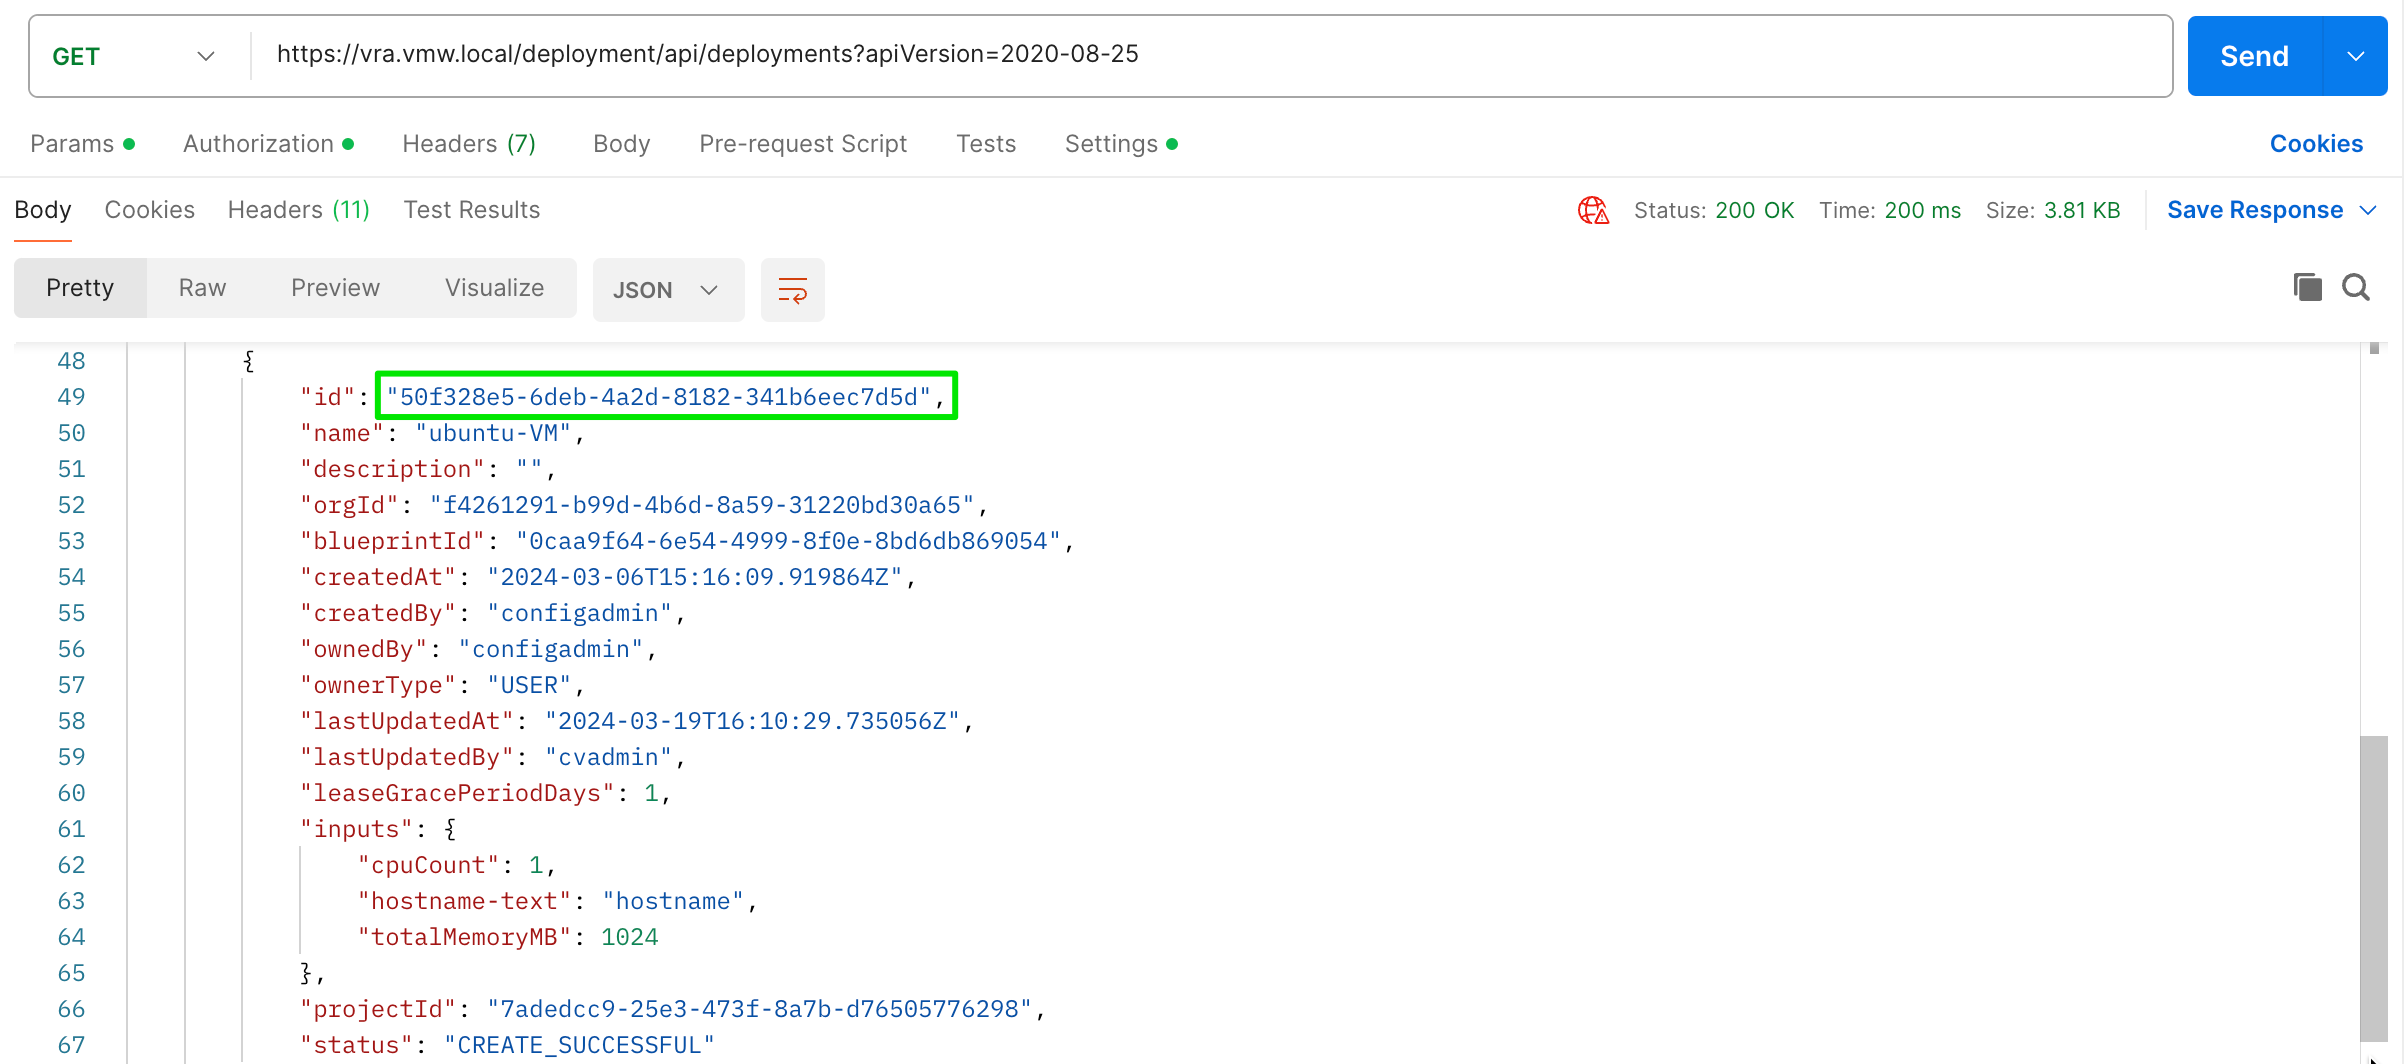
Based on the previous scenario it is interesting to see how we can execute a rebuild based on the API whilst referencing an image. As a prerequisite for this to work, the deployment needs to be in a onboarded state and we need to retrieve both the deploymentid and imageid. For that we use these API-calls:
Retieve deploymentid:
Retrieve all available imageid’s:
Or, better, retrieve available images for a deployment/image:
From the results we should use the imageid prefixed with /resources/images/. With all this information we can now use the following Rebuild-VM-API:
In Postman that would look like:
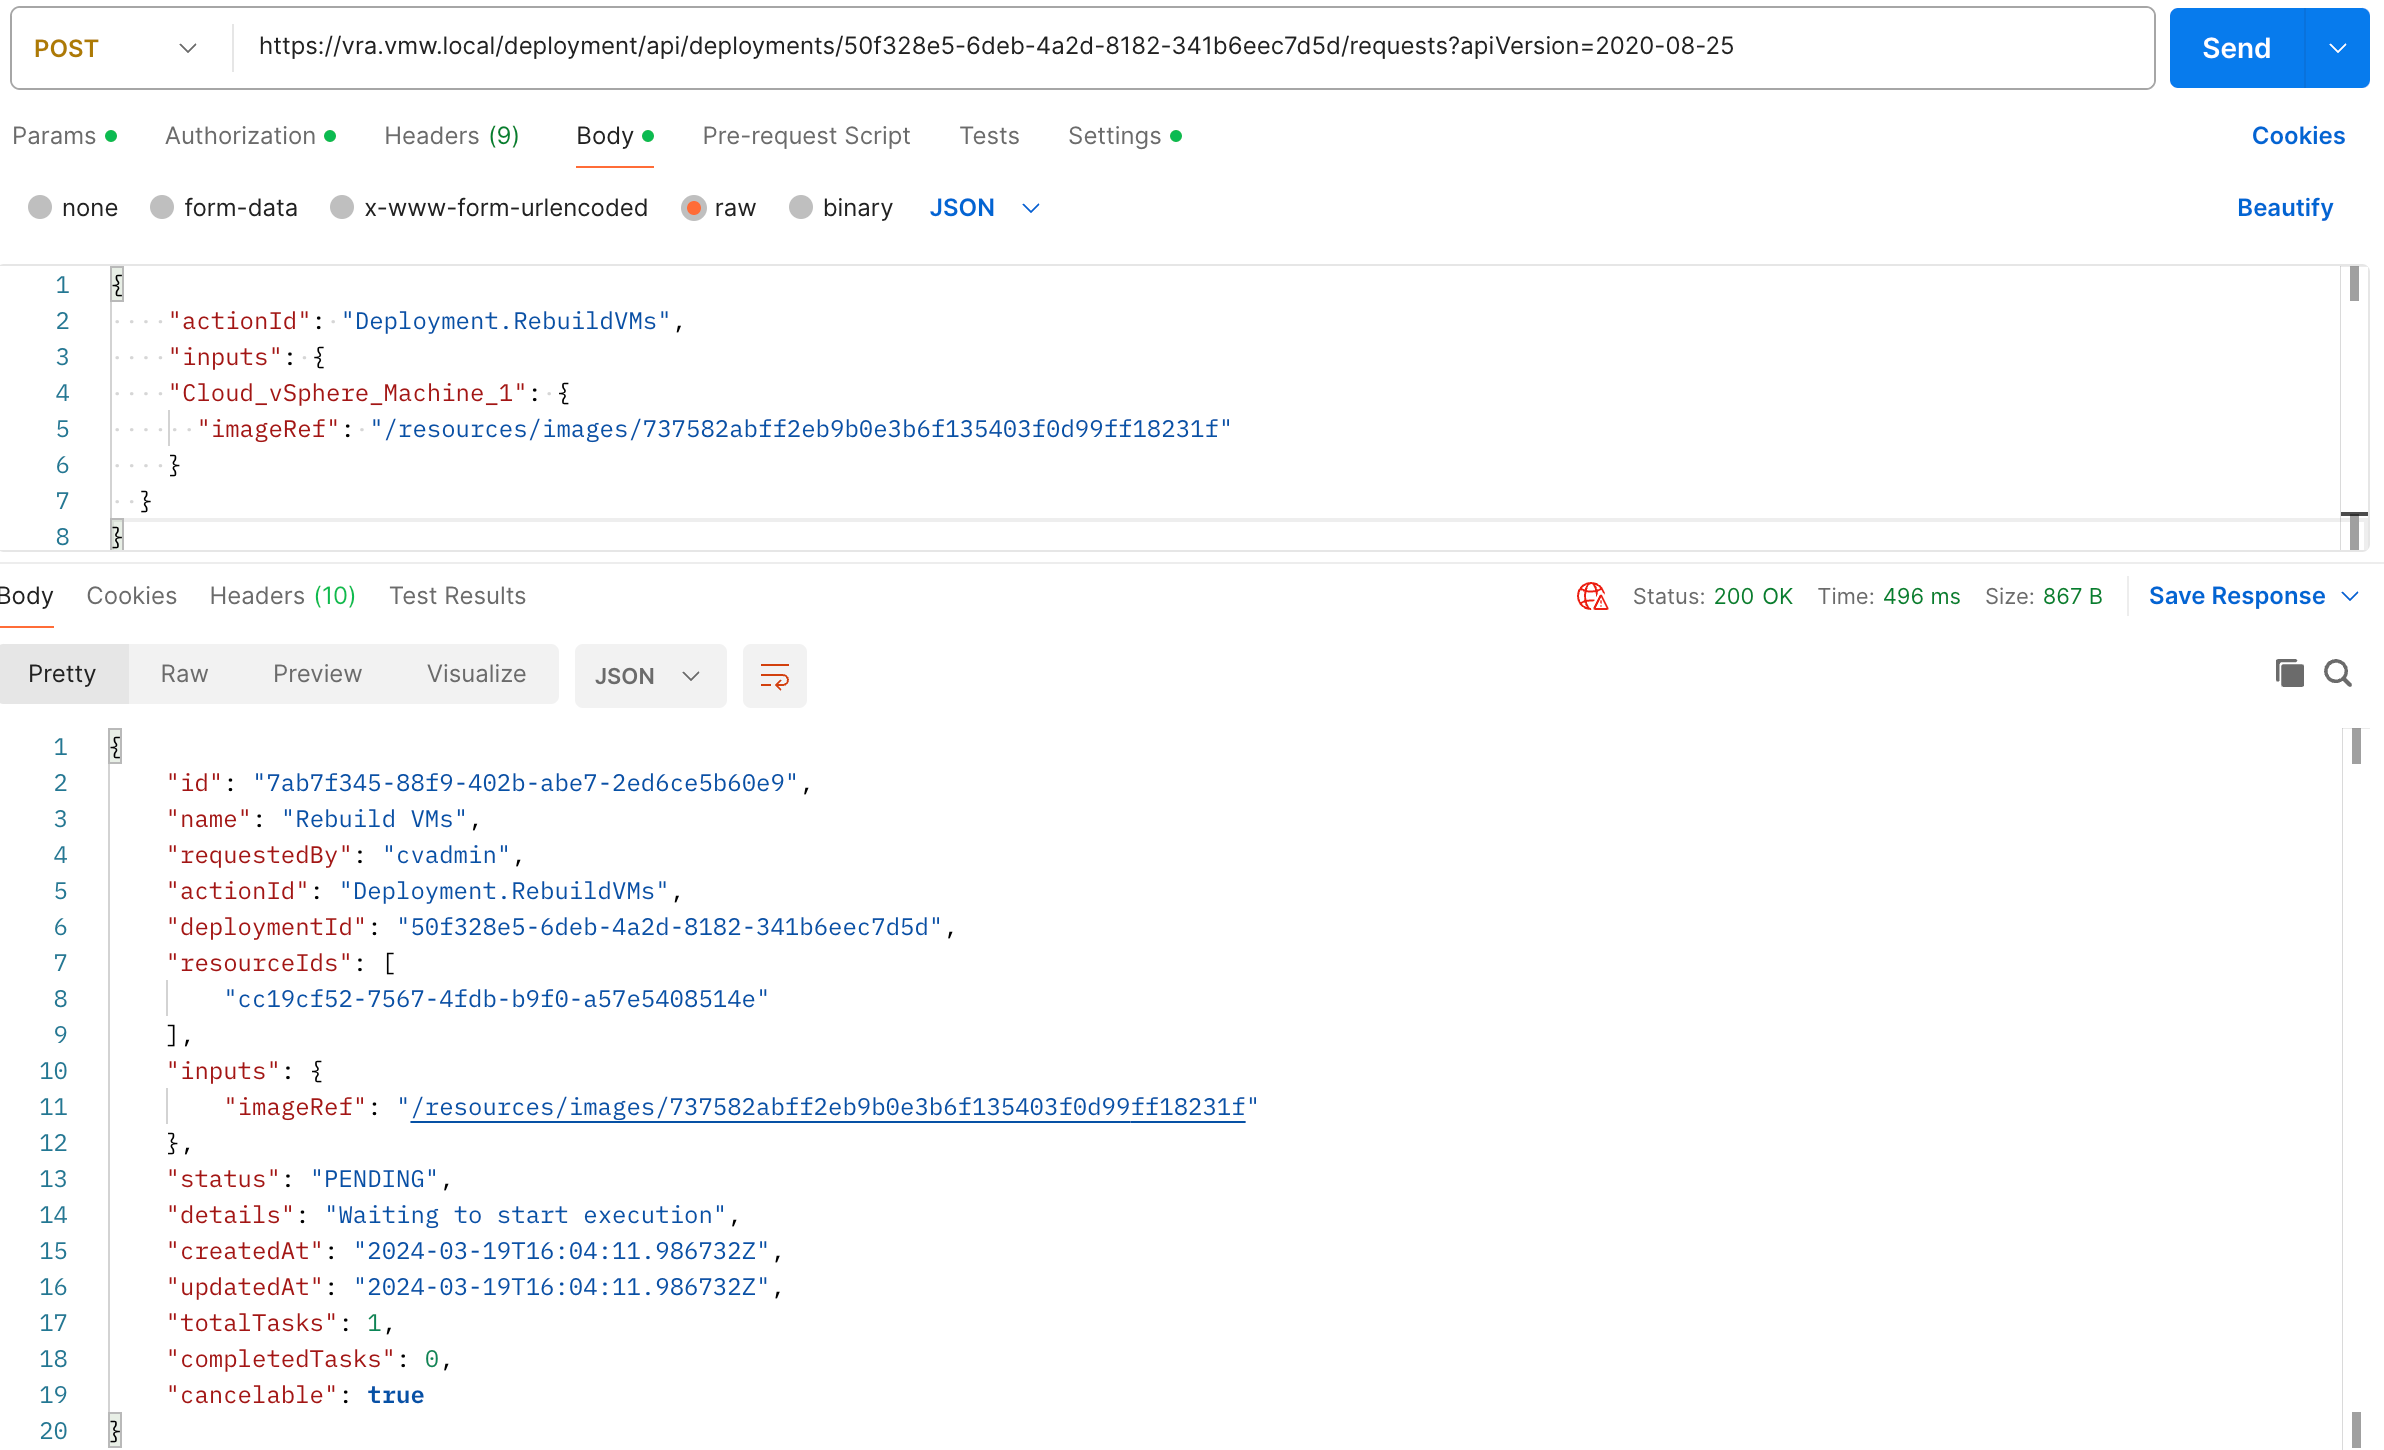
Confirm the rebuild action is actually running in Aria Automation Assembler or Service Broker!
4. Patching new image for existing deployment
This last scenario is probable the most interesting because we can use it to prepare a rebuild that uses a new/updated image. With the proper additional extensibility and/or vRO workflows you can even create a user-friendly day-2 action other than the standard rebuild-VMs action. Below two examples to Update/PATCH an exiting deployment
Custom vRO-WF to update custom-properties:
If used with Extensibility, the Compute Provision phase is best suited to inject the new properties before the VM gets rebuild!
The generic API and Postman examples look like these:

Again, please confirm a new rebuild is using the new referenced image!
This concludes this post. Hope you find it useful!
Comments
Post a Comment