Installation & Configuration of Veeam Kasten on VMware Kubernetes Service(VKS)
Why Backup is Critical in Kubernetes
Kubernetes manages the application state declaratively. But not everything is stored in Git or version-controlled:
- Persistent volumes store critical application data.
- Cluster state (ConfigMaps, Secrets, CRDs, etc.) resides in etcd.
- Workloads like StatefulSets or custom resources may be unique per environment.
A disaster without a recovery plan can mean hours or days of downtime.
What Should You Backup?
To achieve full cluster recovery, we should consider backing up the following resources in the Kubernetes cluster:
- Etcd data — for core cluster state
- Kubernetes Resources — including namespaces, deployments, services, secrets, and CRDs
- Persistent Volumes / Persistent Volume Claims— application data stored on disks
- Custom Resource Definitions (CRDs) and their associated resources
Popular Backup Tools for Kubernetes.
There are several open-source and commercial tools available to do the Kubernetes backup/restore and even migrate the application from one cluster to another
- Velero — Popular open-source tool for backup, restore, and migration.
- Kasten K10 (by Veeam) — Enterprise-grade data management for Kubernetes.
- Portworx by PureStorage — Enterprise-grade backup solution
In this blog, we will discover how to install the Kasten K10 on the VKS workload cluster.
Installation Prerequisites:
We have done this installation on Kubernetes Version 1.30. x and the Kasten version is 7.5.10
- The VKS ( VMware Kubernetes Service) workload cluster should be up and running
- Kubernetes StorageClass should be assigned to the workload cluster.
- Helm 3 package manager should be installed.
- NFS/S3 Storage for storing backup.
In this blog, we will do the internet-connected installation. In the upcoming blogs, we will also share the steps on how to do the airgapped installation on the VKS.
Running the Pre-flight Check
Kasten provides the pre-flight check script, which will do the following validation:-
- Validates if the Kubernetes settings meet the Veeam Kasten requirements.
- Validates the available StorageClasses.
- If a CSI provisioner exists, it will also perform basic validation of the cluster’s CSI capabilities.
Run the following command to deploy the pre-check tool:
$ curl https://docs.kasten.io/downloads/7.5.10/tools/k10_primer.sh | bashAll the checks should pass as shown in the screenshot below
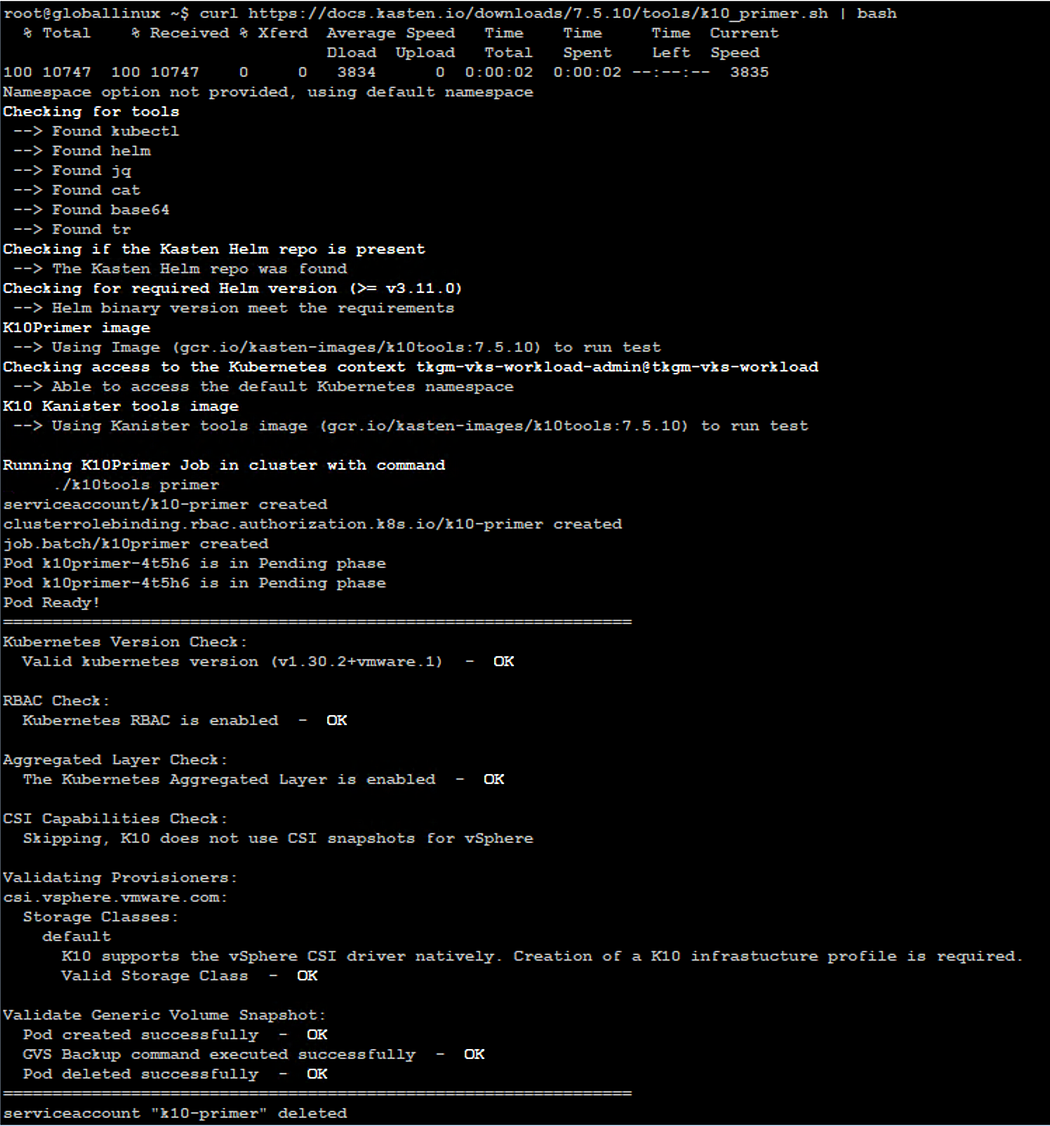
Installation of Kasten on VKS Cluster
Kasten needs to be installed per VKS cluster, and the installation is performed using the Helm package manager.
Step 1:- Add the Kasten Helm Repository and update it.

Step 2:- Create a kaston-io namespace

Step 3:- Kasten Installation using Helm command line
Kasten UI can be exposed as a LoadBalancer, Ingress, or even using ClusterIP and then doing the port-forwarding to access the UI.
We will be using the LoadBalancer route to expose the Kasten UI, and our Kubernetes clusters are already integrated with AVI LoadBalancer to handle the L4 traffic.
$ helm install k10 kasten/k10 --namespace kasten-io --set auth.tokenAuth.enabled=true --set externalGateway.create=true --set services.gateway.loadBalancer.type=LoadBalancer
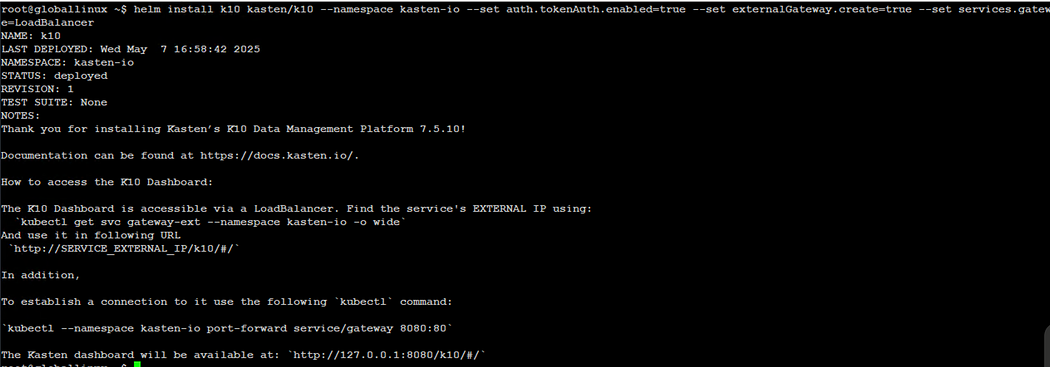
Wait for all the PODS to be up and running in the kaston-io namespace
$ kubectl get pods -n kasten-io

$ kubectl get pvc -n kasten-io

Step 4: Once all the pods are up and running, check the K10 Kubernetes service status
$ kubectl get service -n kasten-io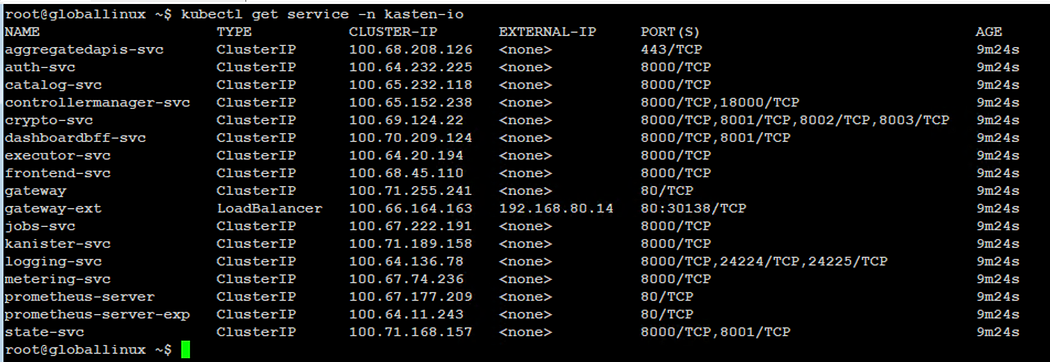
We will see a service name “gateway-ext” with the external IP, which we will use to access the Kasten UI
Link:- http://<LoadBalancer-ip>/k10/#/
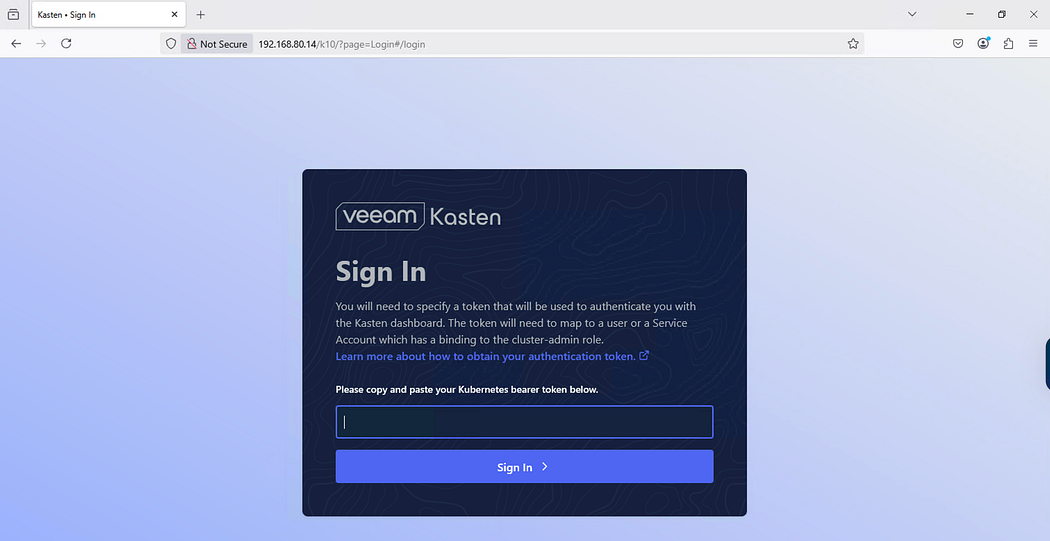
** Please note that UI will take around 2 -3 minutes to come up.
Step 5: K10 UI can be integrated with the LDAP, or we can log in via the Token-based authentication method, which is valid for 24 hours.
$ kubectl --namespace kasten-io create token k10-k10 --duration=24h
Copy the token and log in to the Kasten console

Step 6: Log in to the Kasten UI is successful.
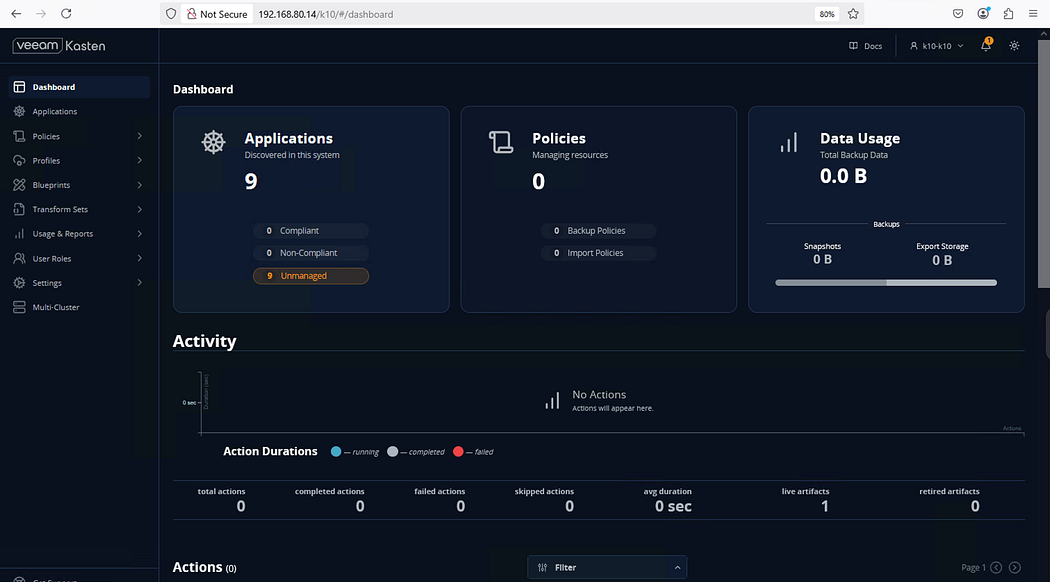
This confirms that the installation is successful on the VKS Clusters.
Configuring Kasten(K10)
Kasten K10 simplifies Kubernetes data protection through modular, declarative configurations. There are two key building blocks in this system
- Location Profiles
- Infrastructure Profiles.
Understanding them is essential to effectively managing how and where your backups and snapshots are stored.
📍 What is a Location Profile
Location Profile in Kasten K10 defines the external object storage location where your backup exports will be stored. This could be:
- AWS S3
- Azure Blob Storage
- Google Cloud Storage
- S3-compatible object stores (e.g., Minio).
We will integrate our VKS clusters with Minio running on the Ubuntu VM.
📍What is an Infrastructure Profile
The Infrastructure Profile defines the snapshot management configuration for a storage class or volume provider. It tells Kasten how to interact with your infrastructure’s snapshot APIs, such as
- Cloud-native snapshot APIs (EBS on AWS, Managed Disks on Azure, etc.)
- CSI snapshot drivers (Container Storage Interface).
We will use the vCenter as an Infrastructure profile for the Volume Snapshots.
Location Profile Configuration
→ Navigate to K10 UI and click on Profile → Location → Create New Profile
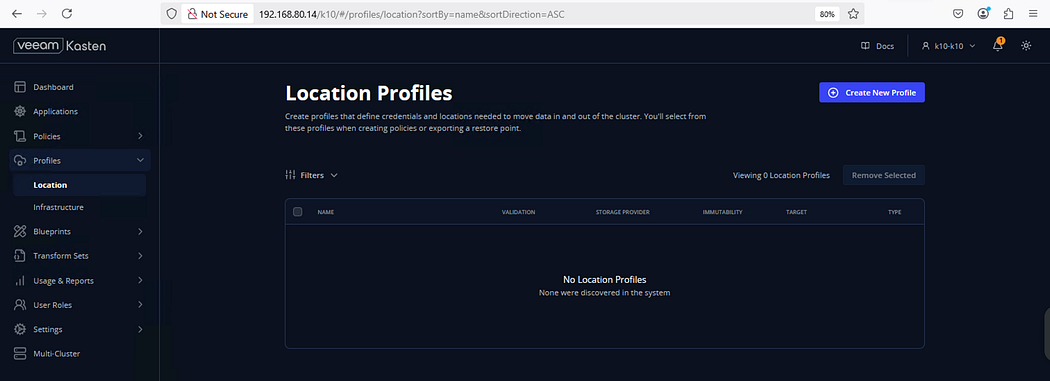
→ Enter the details below and click Next
Name:- minio-vks-integration( name of your choice)
Storage Provider:- Select S3 compatible

→ Enter the details below:
# S3 Access Key ( Minio Access Key)
# S3 Secret ( Minio Secret)
# Endpoint ( Minio URL)
# Region ( Region where bucket resides:- (default))
# Bucket ( Name of the Bucket)
Click Next,
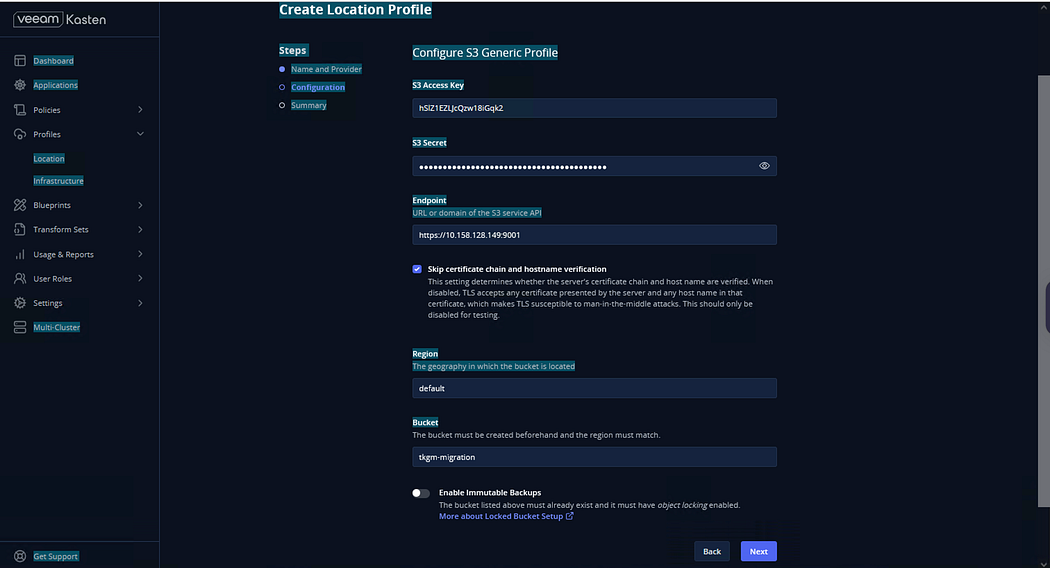
Click Submit
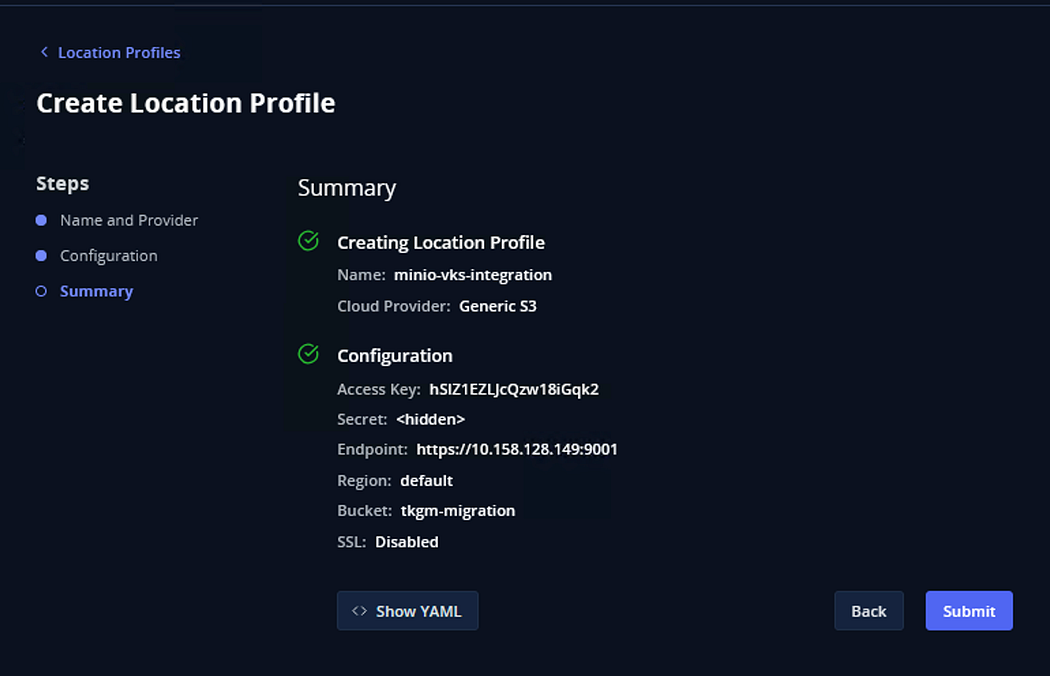
A message will appear that the Location Profile is successfully configured

Infrastructure Profile Configuration
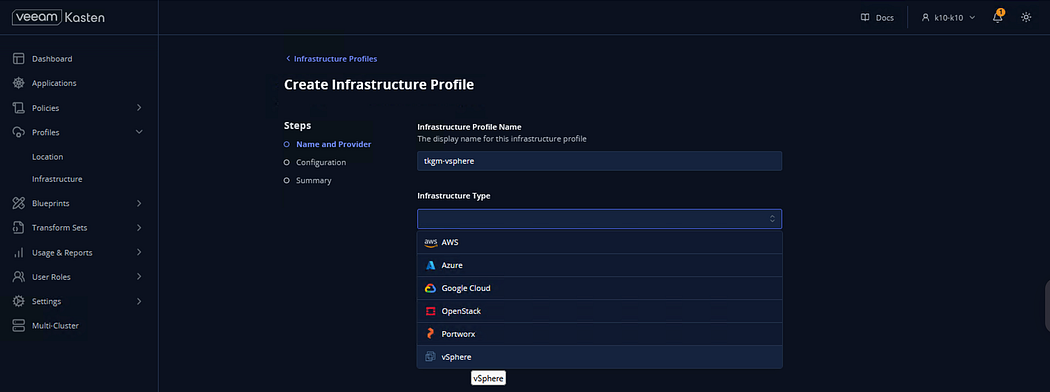
→ Navigate to K10 UI and click on Profile → Infrastructure → Create New Profile

→ Enter the details below
# Infrastructure Profile Name:- ( name of your choice)
# Infrastructure Type: Select vSphere
Click Next
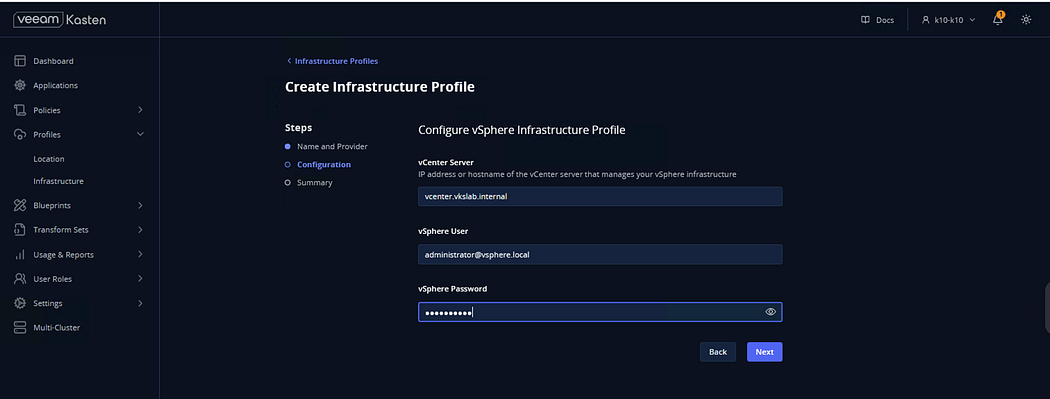
→ Enter the details below and click Next
# vCenter Server : ( vCenter Server address)
# vSphere User: ( vCenter UserName)
# vSphere Password: (vCenter Password)
Confirm the settings and click Submit
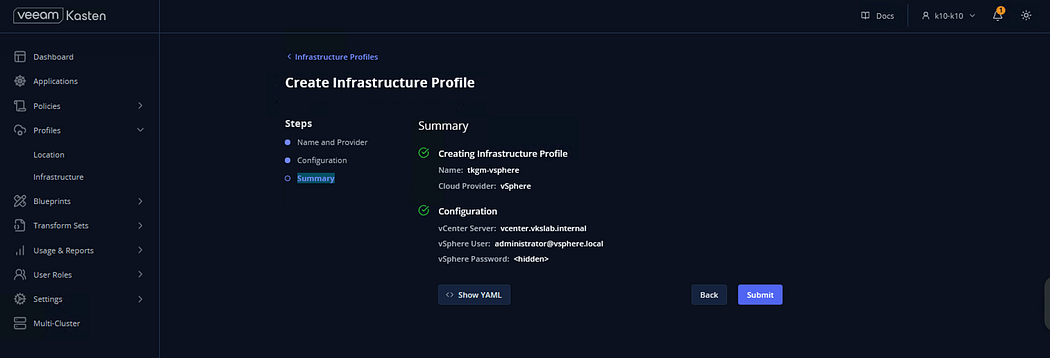
A message will appear that the Infrastructure Profile is successfully configured

Final Validation
After the VKS clusters are successfully configured with Kasten, you will see all the Workload Cluster Namespaces under the ( Application ) tab on the Kasten UI.
Click on the 3-dots next to the namespace, you will get the option to take the Snapshot/Backup and perform additional operations on the namespace using Kasten.

In this blog, we have discussed how Kasten can be installed on VKS clusters to perform Kubernetes operations such as backup, restore, and application migration to other VKS clusters.
In the Next blog, we will discuss how to backup and restore the VKS clusters using Kasten.

Comments
Post a Comment